はじめに
PulumiはオープンソースのIaCツールで、クラウドリソースのプロビジョニングとデプロイを行います。
TerraformやOpenTofu相当の役割を担えます。
それらとの大きな違いの一つは、定義ファイルが複数のプログラミング言語で書けるという点です。そこが気になって触ってみました。
Pulumi - Infrastructure as Code in Any Programming Language
主な特徴は以下の通りです。
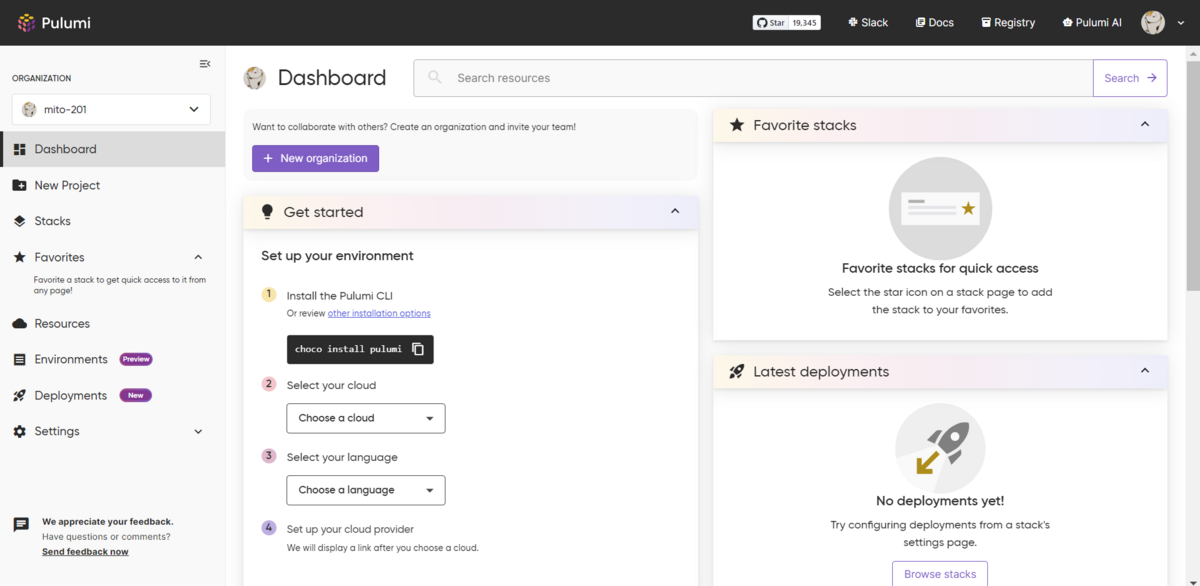
Pulumi Cloudのダッシュボードです。Pulumiの利用に登録必須で、個人利用は無料です。
基本的なコマンドの流れです。
| Pulumi.yamlの有無 |
Pulumi Cloud登録の有無 |
AWSリソースの有無 |
実行コマンド |
結果 |
| なし |
なし |
なし |
pulumi new aws-yaml |
Pulumi.yamlを作成し、Pulumi Cloudにも登録する |
| あり |
あり |
なし |
pulumi up |
Yesでリソースを作成する |
| あり |
あり |
あり |
pulumi destroy |
Yesでリソースを削除する |
| あり |
あり |
なし |
pulumi stack rm dev |
スタック名の入力で、Pulumi Cloudの登録を削除する |
| あり |
なし |
なし |
rm Pulumi.yaml |
Pulumi.yamlを削除する |
Get Started(S3バケットの構築)
PulumiでAWSのS3バケットを構築し、静的Webサイトをホスティングする手順です。
本記事では、s3バケットの構築までを行います。
Get started with Pulumi & AWS | Pulumi Docs
環境の構築
まず、公式ページでPulumi Cloudのアカウントを作成します。
Pulumi - Infrastructure as Code in Any Programming Language
次にPulumiをインストールしますが、Pulumi公式のコンテナイメージがDockerhubで公開されていますので、それをVscodeのDevcontaierで利用します。
今回Pulumiの定義ファイルはYamlで書くので、言語ランタイムのインストールは不要です。
環境変数に、AWSのアクセスキーとシークレットアクセスキーを設定します。
なお、aws cliはコンテナイメージにインストール済みです。
$ aws --version
aws-cli/2.15.30 Python/3.11.8 Linux/5.15.146.1-microsoft-standard-WSL2 exe/x86_64.debian.11 prompt/off
$ export AWS_ACCESS_KEY_ID="<YOUR_ACCESS_KEY_ID>"
$ export AWS_SECRET_ACCESS_KEY="<YOUR_SECRET_ACCESS_KEY_ID>"
適当な作業ディレクトリを作成します。
$ mkdir -p get_started/yaml // 適当なディレクトリを作成
$ cd get_started/yaml // yamlディレクトリは他の言語と環境が混ざらないように
プロジェクトの作成
Pulumi CLIコマンドを実行し、プロジェクトを作成します。
$ pulumi new aws-yaml
Manage your Pulumi stacks by logging in.
Run `pulumi login --help` for alternative login options.
Enter your access token from https://app.pulumi.com/account/tokens // URLを開いてトークンを作成する
or hit <ENTER> to log in using your browser : **********
Welcome to Pulumi!
Pulumi helps you create, deploy, and manage infrastructure on any cloud using
your favorite language. You can get started today with Pulumi at:
https://www.pulumi.com/docs/get-started/
Tip: Resources you create with Pulumi are given unique names (a randomly
generated suffix) by default. To learn more about auto-naming or customizing resource
names see https://www.pulumi.com/docs/intro/concepts/resources/#autonaming.
This command will walk you through creating a new Pulumi project.
Enter a value or leave blank to accept the (default), and press <ENTER>.
Press ^C at any time to quit.
project name (yaml): // ブランクでEnterを押すと、デフォルト名のyamlが入力される。以降、デフォルトで進める
project description (A minimal AWS Pulumi YAML program):
Created project 'yaml'
Please enter your desired stack name.
To create a stack in an organization, use the format <org-name>/<stack-name> (e.g. `acmecorp/dev`).
stack name (dev): // エンター
Created stack 'dev'
aws:region: The AWS region to deploy into (us-east-1): ap-northeast-1 // 東京リージョンを指定
Saved config
Your new project is ready to go!
To perform an initial deployment, run `pulumi up`
$
Pulumi.yamlとPulumi.dev.yamlが作成されます。
- Pulumi.yaml
- プロジェクトとスタック リソースを管理するプログラムの両方を定義します。
- Pulumi.dev.yaml
$ ls -la
total 0
drwxr-xr-x 1 vscode vscode 512 Mar 20 09:11 .
drwxr-xr-x 1 vscode vscode 512 Mar 20 07:42 ..
-rw-r--r-- 1 vscode vscode 37 Mar 20 09:11 Pulumi.dev.yaml
-rw-r--r-- 1 vscode vscode 298 Mar 20 09:08 Pulumi.yaml
それぞれの内容は以下になります。
$ cat Pulumi.yaml
name: yaml
runtime: yaml
description: A minimal AWS Pulumi YAML program
config:
pulumi:tags:
value:
pulumi:template: aws-yaml
outputs:
bucketName: ${my-bucket.id}
resources:
my-bucket:
type: aws:s3:Bucket
- Pulumi.dev.yaml
- 東京リージョンを指定します。
- 環境変数にリージョンを設定していても、プロンプトで聞かれます。
$ cat Pulumi.dev.yaml
config:
  aws:region: ap-northeast-1
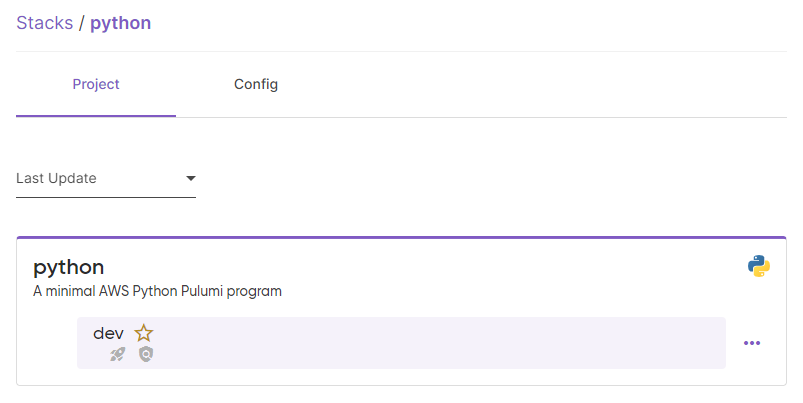
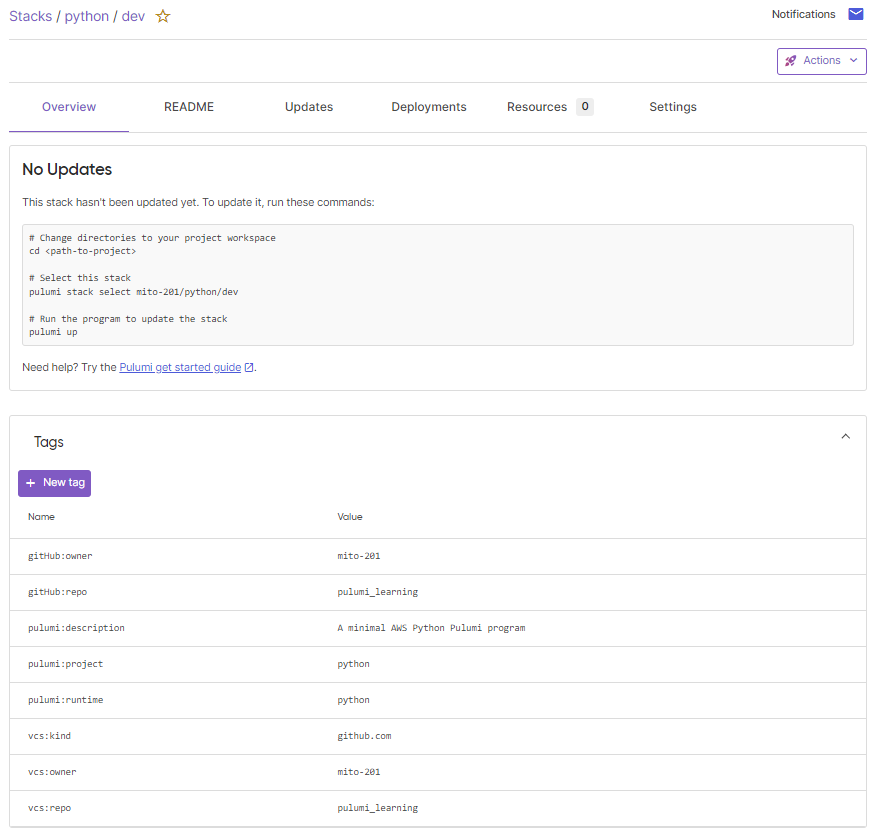
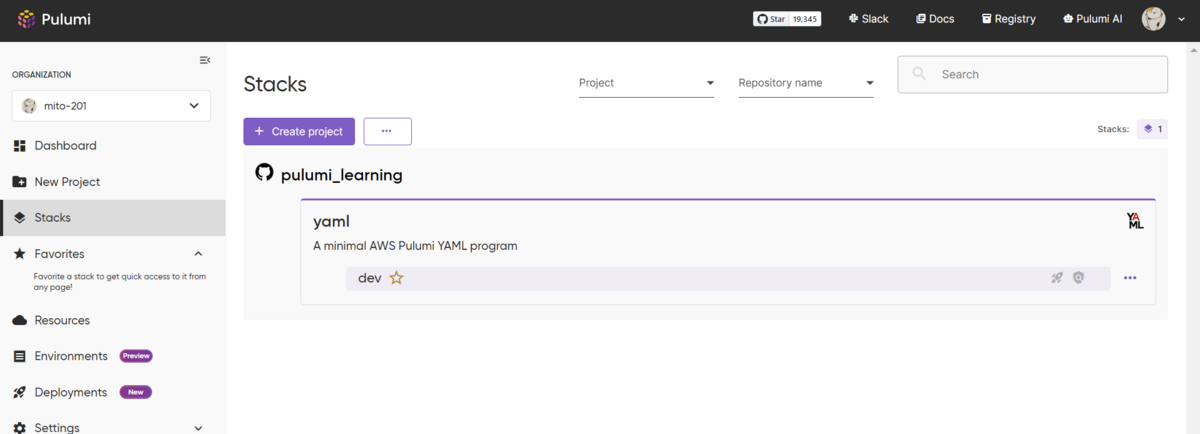
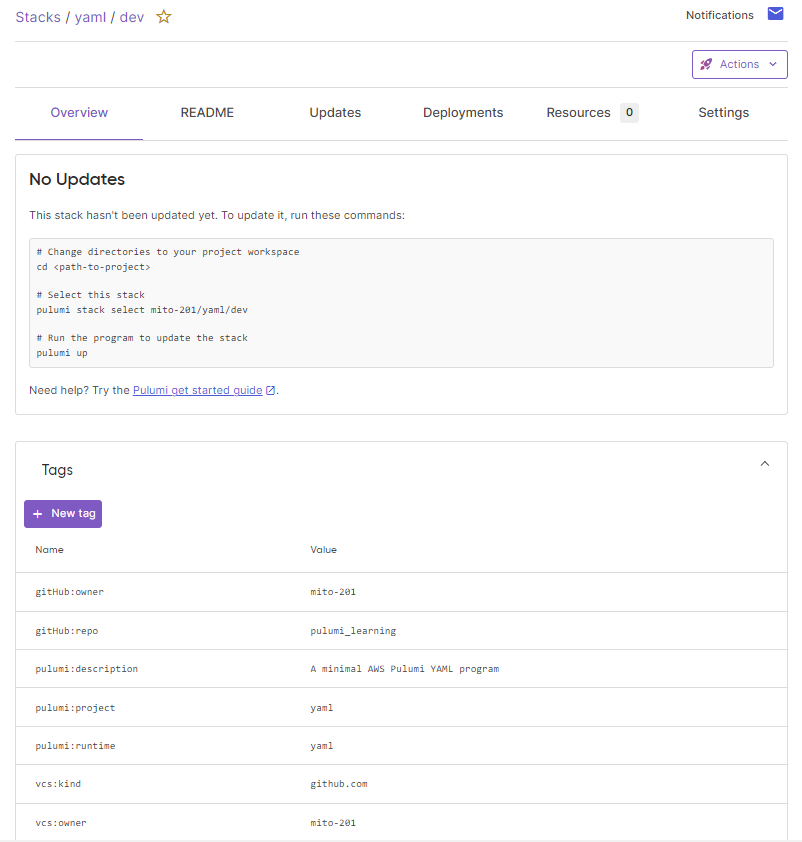
作成したプロジェクトは、Pulumi Cloudでは以下のように表示されます。
GitHubアカウントでサインインしたからか、クローンしたGitHubリポジトリでプロジェクトを作成したからなのか、GitHubのリポジトリも表示されています。
リソースの構築
pulumiコマンドで、リソースを作成します。
$ pulumi up
Previewing update (dev)

View in Browser (Ctrl+O): https://app.pulumi.com/mito-201/yaml/dev/previews/******-****-****-****-******

Downloading plugin: 215.98 MiB / 215.98 MiB [======================] 100.00% 44s

[resource plugin aws-6.27.0] installing
     Type                 Name       Plan
 +   pulumi:pulumi:Stack  yaml-dev   create
 +   └─ aws:s3:Bucket     my-bucket  create

Outputs:
    bucketName: output<string>

Resources:
    + 2 to create

Do you want to perform this update?  [Use arrows to move, type to filter]
  yes
> no
  details
定義ファイルを実行した場合のプレビューを表示します。
Terraform plan相当の意味を持ち、作成/差分/削除のリソースが表示されます。
その後に実行するコマンドは、3つの選択があります。
矢印キーで yes を選択します。
Do you want to perform this update? yes
Updating (dev)
View in Browser (Ctrl+O): https://app.pulumi.com/mito-201/yaml/dev/updates/1
Type Name Status
+ pulumi:pulumi:Stack yaml-dev created (4s)
+ └─ aws:s3:Bucket my-bucket created (2s)
Outputs:
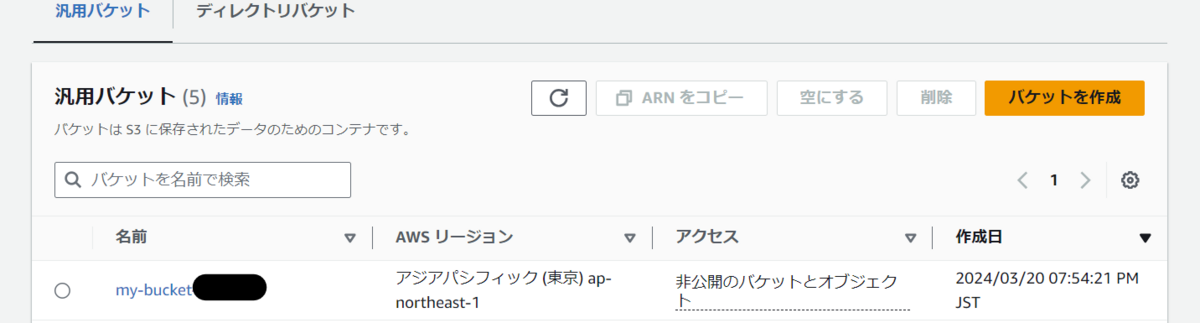
bucketName: "my-bucket-******"
Resources:
+ 2 created
Duration: 6s
$
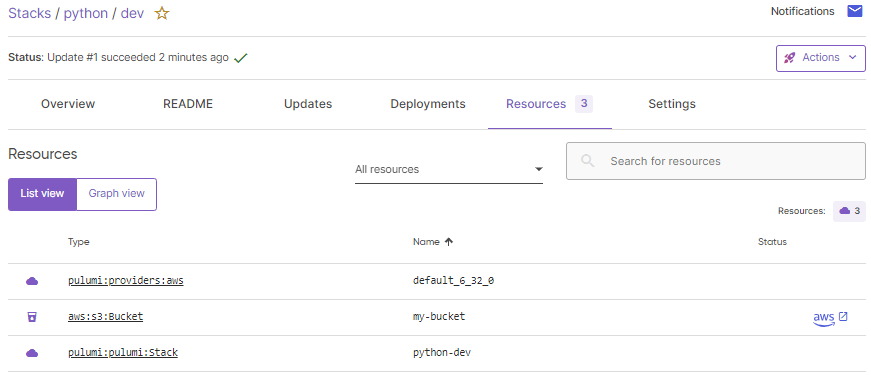
$ pulumi stack output bucketName
my-bucket-******
$
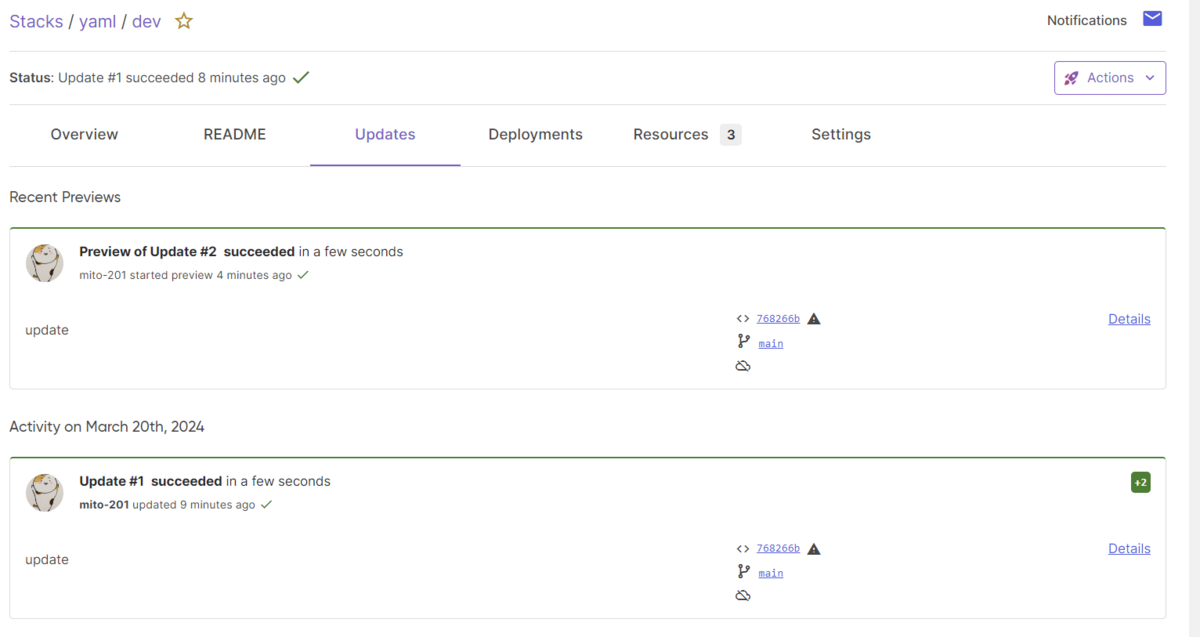
もう一度pulumi upを実行すると、プレビューの結果が2 unchangedに変わりました。
$ pulumi up
Previewing update (dev)

View in Browser (Ctrl+O): https://app.pulumi.com/mito-201/yaml/dev/previews/******-****-****-****-**********

     Type                 Name      Plan
     pulumi:pulumi:Stack  yaml-dev

Resources:
    2 unchanged

Do you want to perform this update?  [Use arrows to move, type to filter]
  yes
> no
  details
リソースの削除
pulumiコマンドで、作成したリソースを削除します。
$ pulumi destroy
Previewing destroy (dev)

View in Browser (Ctrl+O): https://app.pulumi.com/mito-201/yaml/dev/previews/******-****-****-****-**********

     Type                 Name       Plan
 -   pulumi:pulumi:Stack  yaml-dev   delete
 -   └─ aws:s3:Bucket     my-bucket  delete

Outputs:
  - bucketName: "my-bucket-******"

Resources:
    - 2 to delete

Do you want to perform this destroy?  [Use arrows to move, type to filter]
  yes
> no
  details

Do you want to perform this destroy? yes
Destroying (dev)

View in Browser (Ctrl+O): https://app.pulumi.com/mito-201/yaml/dev/updates/2

     Type                 Name       Status
 -   pulumi:pulumi:Stack  yaml-dev   deleted (0.51s)
 -   └─ aws:s3:Bucket     my-bucket  deleted (0.88s)

Outputs:
  - bucketName: "my-bucket-******"

Resources:
    - 2 deleted

Duration: 4s

The resources in the stack have been deleted, but the history and configuration associated with the stack are still maintained.
If you want to remove the stack completely, run `pulumi stack rm dev`.
$
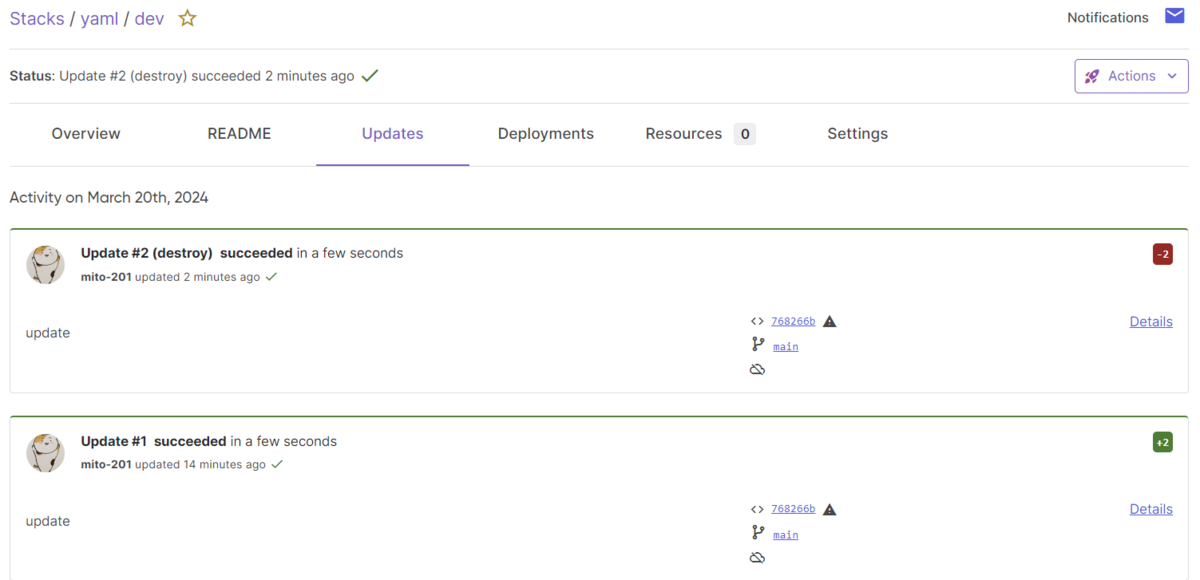
Pulimi Cloudにはスタックが残っているので、pulumi stack rm devで完全に削除します。
$ pulumi stack rm dev
This will permanently remove the 'dev' stack!
Please confirm that this is what you'd like to do by typing `dev`: dev
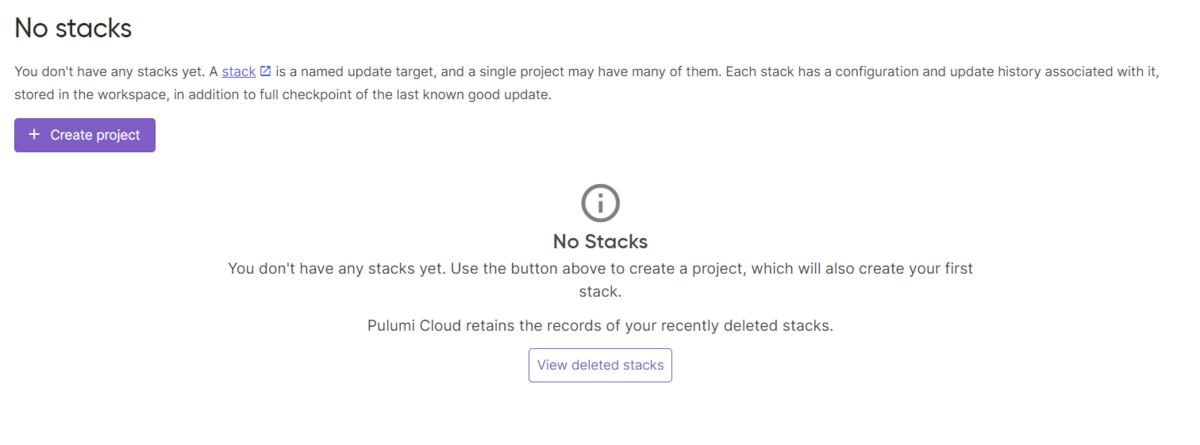
Stack 'dev' has been removed!
$
EC2の構築
テンプレートvm-aws-yamlを使って、EC2を構築します。
プロジェクトの作成
コマンドの流れはS3バケットの構築と変わりません。
$ mkdir -p my-virtual-machine/yaml && cd my-virtual-machine/yaml
$
$ pulumi new vm-aws-yaml
This command will walk you through creating a new Pulumi project.

Enter a value or leave blank to accept the (default), and press <ENTER>.
Press ^C at any time to quit.

project name (yaml):
project description (A Pulumi YAML program to deploy a virtual machine on Amazon EC2):
Created project 'yaml'

Please enter your desired stack name.
To create a stack in an organization, use the format <org-name>/<stack-name> (e.g. `acmecorp/dev`).
stack name (dev):
Created stack 'dev'

aws:region: The AWS region to deploy into (us-west-2): ap-northeast-1
instanceType: The Amazon EC2 instance type (t3.micro):
vpcNetworkCidr: The network CIDR to use for the VPC (10.0.0.0/16):
Saved config

Your new project is ready to go!

To perform an initial deployment, run `pulumi up`

$
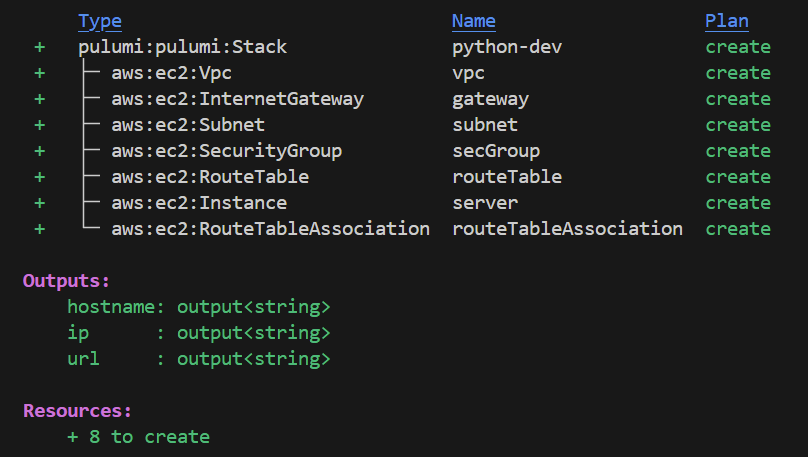
作成したPulumi.yamlです。
テンプレートでは、シンプルなWEBサーバを公開するために、VPC、Subnet、SG、InternetGW、EC2などを構築します。
$ cat Pulumi.yaml
name: yaml
runtime: yaml
description: A Pulumi YAML program to deploy a virtual machine on Amazon EC2
config:
instanceType:
type: string
default: t3.micro
pulumi:tags:
value:
pulumi:template: vm-aws-yaml
vpcNetworkCidr:
type: string
default: 10.0.0.0/16
outputs:
hostname: ${server.publicDns}
ip: ${server.publicIp}
url: http://${server.publicDns}
resources:
gateway:
properties:
vpcId: ${vpc.id}
type: aws:ec2:InternetGateway
routeTable:
properties:
routes:
- cidrBlock: 0.0.0.0/0
gatewayId: ${gateway.id}
vpcId: ${vpc.id}
type: aws:ec2:RouteTable
routeTableAssociation:
properties:
routeTableId: ${routeTable.id}
subnetId: ${subnet.id}
type: aws:ec2:RouteTableAssociation
secGroup:
properties:
description: Enable HTTP access
egress:
- cidrBlocks:
- 0.0.0.0/0
fromPort: 0
protocol: -1
toPort: 0
ingress:
- cidrBlocks:
- 0.0.0.0/0
fromPort: 80
protocol: tcp
toPort: 80
vpcId: ${vpc.id}
type: aws:ec2:SecurityGroup
server:
properties:
ami: ${ami}
instanceType: ${instanceType}
subnetId: ${subnet.id}
tags:
Name: webserver
userData: ${userData}
vpcSecurityGroupIds:
- ${secGroup}
type: aws:ec2:Instance
subnet:
properties:
cidrBlock: 10.0.1.0/24
mapPublicIpOnLaunch: true
vpcId: ${vpc.id}
type: aws:ec2:Subnet
vpc:
properties:
cidrBlock: ${vpcNetworkCidr}
enableDnsHostnames: true
enableDnsSupport: true
type: aws:ec2:Vpc
variables:
ami:
fn::invoke:
arguments:
filters:
- name: name
values:
- "amzn2-ami-hvm-*"
mostRecent: true
owners:
- "amazon"
function: aws:ec2:getAmi
return: id
userData: |
echo "Hello, World from Pulumi!" > index.html
nohup python -m SimpleHTTPServer 80 &
$
リソースの構築
pulumi upでデプロイします。
$ pulumi up
Previewing update (dev)
View in Browser (Ctrl+O): https://app.pulumi.com/mito-201/yaml/dev/previews/********-****-****-****-**********
Type Name Plan
+ pulumi:pulumi:Stack yaml-dev create
+ ├─ aws:ec2:Vpc vpc create
+ ├─ aws:ec2:Subnet subnet create
+ ├─ aws:ec2:SecurityGroup secGroup create
+ ├─ aws:ec2:InternetGateway gateway create
+ ├─ aws:ec2:RouteTable routeTable create
+ ├─ aws:ec2:RouteTableAssociation routeTableAssociation create
+ └─ aws:ec2:Instance server create
Outputs:
hostname: output<string>
ip : output<string>
url : output<string>
Resources:
+ 8 to create
Do you want to perform this update? yes
Updating (dev)
View in Browser (Ctrl+O): https://app.pulumi.com/mito-201/yaml/dev/updates/1
Type Name Status
+ pulumi:pulumi:Stack yaml-dev created (40s)
+ ├─ aws:ec2:Vpc vpc created (12s)
+ ├─ aws:ec2:InternetGateway gateway created (0.95s)
+ ├─ aws:ec2:Subnet subnet created (11s)
+ ├─ aws:ec2:SecurityGroup secGroup created (3s)
+ ├─ aws:ec2:RouteTable routeTable created (1s)
+ ├─ aws:ec2:RouteTableAssociation routeTableAssociation created (0.76s)
+ └─ aws:ec2:Instance server created (13s)
Outputs:
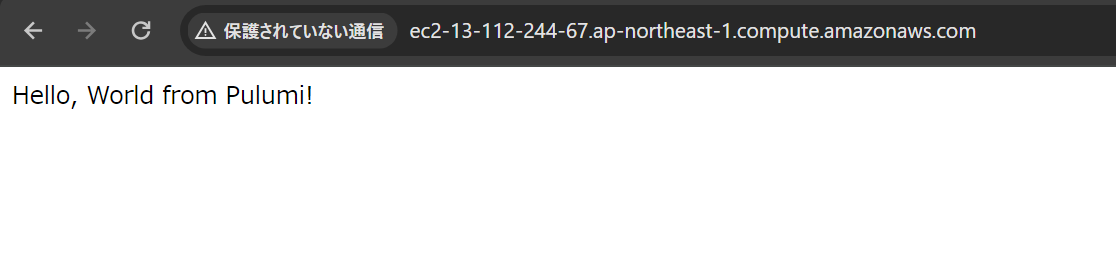
hostname: "ec2-13-112-244-67.ap-northeast-1.compute.amazonaws.com"
ip : "13.112.244.67"
url : "http://ec2-13-112-244-67.ap-northeast-1.compute.amazonaws.com"
Resources:
+ 8 created
Duration: 41s
$
無事にアクセスできました。
リソースの削除
確認後は、リソースを削除します。
$ pulumi destroy
Previewing destroy (dev)

View in Browser (Ctrl+O): https://app.pulumi.com/mito-201/yaml/dev/previews/*********-****-****-****-*********

     Type                              Name                   Plan
 -   pulumi:pulumi:Stack               yaml-dev               delete
 -   ├─ aws:ec2:RouteTableAssociation  routeTableAssociation  delete
 -   ├─ aws:ec2:RouteTable             routeTable             delete
 -   ├─ aws:ec2:Instance               server                 delete
 -   ├─ aws:ec2:SecurityGroup          secGroup               delete
 -   ├─ aws:ec2:InternetGateway        gateway                delete
 -   ├─ aws:ec2:Subnet                 subnet                 delete
 -   └─ aws:ec2:Vpc                    vpc                    delete

Outputs:
  - hostname: "ec2-13-112-244-67.ap-northeast-1.compute.amazonaws.com"
  - ip      : "13.112.244.67"
  - url     : "http://ec2-13-112-244-67.ap-northeast-1.compute.amazonaws.com"

Resources:
    - 8 to delete

Do you want to perform this destroy? yes
Destroying (dev)

View in Browser (Ctrl+O): https://app.pulumi.com/mito-201/yaml/dev/updates/2

     Type                              Name                   Status
 -   pulumi:pulumi:Stack               yaml-dev               deleted (0.26s)
 -   ├─ aws:ec2:RouteTableAssociation  routeTableAssociation  deleted (0.76s)
 -   ├─ aws:ec2:RouteTable             routeTable             deleted (0.95s)
 -   ├─ aws:ec2:Instance               server                 deleted (61s)
 -   ├─ aws:ec2:Subnet                 subnet                 deleted (0.70s)
 -   ├─ aws:ec2:SecurityGroup          secGroup               deleted (1s)
 -   ├─ aws:ec2:InternetGateway        gateway                deleted (1s)
 -   └─ aws:ec2:Vpc                    vpc                    deleted (1s)

Outputs:
  - hostname: "ec2-13-112-244-67.ap-northeast-1.compute.amazonaws.com"
  - ip      : "13.112.244.67"
  - url     : "http://ec2-13-112-244-67.ap-northeast-1.compute.amazonaws.com"

Resources:
    - 8 deleted

Duration: 1m9s

The resources in the stack have been deleted, but the history and configuration associated with the stack are still maintained.
If you want to remove the stack completely, run `pulumi stack rm dev`.
$
$ pulumi stack rm dev
This will permanently remove the 'dev' stack!
Please confirm that this is what you'd like to do by typing `dev`: でdev
Stack 'dev' has been removed!
$
その他
コマンドフロー
リソース作成から削除のコマンドフローを、定義ファイルとクラウドの登録状況の遷移と合わせてまとめました。
| Pulumi.yamlの有無 |
Pulumi Cloud登録の有無 |
AWSリソースの有無 |
実行コマンド |
結果 |
| なし |
なし |
なし |
pulumi new aws-yaml |
Pulumi.yamlを作成し、Pulumi Cloudにも登録する |
| あり |
あり |
なし |
pulumi up |
Yesでリソースを作成する |
| あり |
あり |
あり |
pulumi destroy |
Yesでリソースを削除する |
| あり |
あり |
なし |
pulumi stack rm dev |
スタック名の入力で、Pulumi Cloudの登録を削除する |
| あり |
なし |
なし |
pulumi stack init |
スタック名の入力で、Pulumi Cloudに登録する |
| あり |
なし |
なし |
pulumi up |
<org-name>/スタック名の入力でPulumi Cloudに登録し、Yesでリソースを作成する |
| あり |
あり |
あり |
pulumi down |
Yesでリソースを削除する。Pulumi Cloudは削除しない |
| あり |
あり |
あり |
pulumi stack rm dev |
スタック名を入力しても、エラーで失敗する |
| なし |
なし |
なし |
pulumi up |
Pulumi.yamlがないため、コマンドエラー |
新規プロジェクトは、空のディレクトリで作成できる
ファイルがあるディレクトリで、新規プロジェクトを作成しようとしても失敗します。
Pulumi.yamlのファイル名を変更しても、作成に失敗しました。
$ pulumi new aws-yaml
error: /workspaces/pulumi_learning/get_started/yaml is not empty; rerun in an empty directory, pass the path to an empty directory to --dir, or use --force
$